Computer Setup Instructions
We will be using a program called JupyterLab as our development environment for the workshop. I recommend using Anaconda or Miniconda to install JupyterLab and Python. Anaconda/Miniconda are Python distributions which include core Python plus a package manager (conda) to manage all the 3rd party libraries you’ll need for scientific programming.
Below are a few different options for setting up your laptop. You’ll want to have the software installed and working properly before the workshop starts. Sometimes a few minor tweaks are needed to get the software working on different systems, so if you have any problems please email me (jwalker@eoas.ubc.ca) to help you sort things out.
Alternatively, if you don’t want to install any software on your computer yet, you can use JupyterLab online at https://ubc.syzygy.ca/ for the workshop. For this option, your laptop must be connected campus wifi and you’ll need to make sure you have your username and password for campus-wide login (CWL). However, if you’re planning to use Python regularly in your work, I recommend using one of the options below to install the software on your laptop rather than the online option. This way we can help you sort out any installation issues and make sure you’re all set with a development environment you can continue using after the workshop.
Data and Workshop Materials
Please download the zipped folder of workshop files and unzip/extract. You can also view the slides online.
Installation Option A: Full Anaconda Distribution
This option is the easiest to set up and start using. The full Anaconda distribution includes Python, JupyterLab, and hundreds of other popular scientific libraries. With this option, you don’t need any experience with the command line - you can use the graphical interface (Anaconda Navigator) to launch JupyterLab and manage libraries. Or you can work from the command line, if you prefer.
However, this option requires the most disk space—just under 6 GB on Windows and I’m assuming similar on a Mac.
Step 1: Download and Install
Click the “Download” button under the latest Python 3 version from the Anaconda download page (the web page should automatically detect your operating system and provide the correct version of the installer with the “Download” button). After it finishes downloading, run the installer, making sure to use all the recommended default settings. We won’t be using Microsoft Visual Studio Code, so when the installer asks if you want to install it, you can just click “Skip”.
It could take up to half an hour to install, so once you’ve walked through the initial prompts and clicked “Install”, you might want to grab some lunch or go for a walk, leaving your laptop plugged in so it doesn’t try to go to sleep. For more details on the intallation steps, you can check out the instructions for Windows, Mac, or Linux. Note: the Windows installer says 3 GB free space is required, but on my computer I found that the software uses almost double that. These numbers might be a bit different on Mac or Linux.
Once you’ve installed the full Anaconda distribution, you’ll immediately have access to all the main data analysis libraries without having to find and install them yourself!
Step 2: Test Your Installation
To make sure the software is working properly, look for a newly installed program called “Anaconda Navigator” in your computer’s menu, and run it to open up a window similar to the screenshot below. It might take a minute to initialize, and a few other windows might open and close while it’s doing so, this is all normal. If a dialog box pops up that says there’s a newer version available, click “OK” and let it update and restart itself.
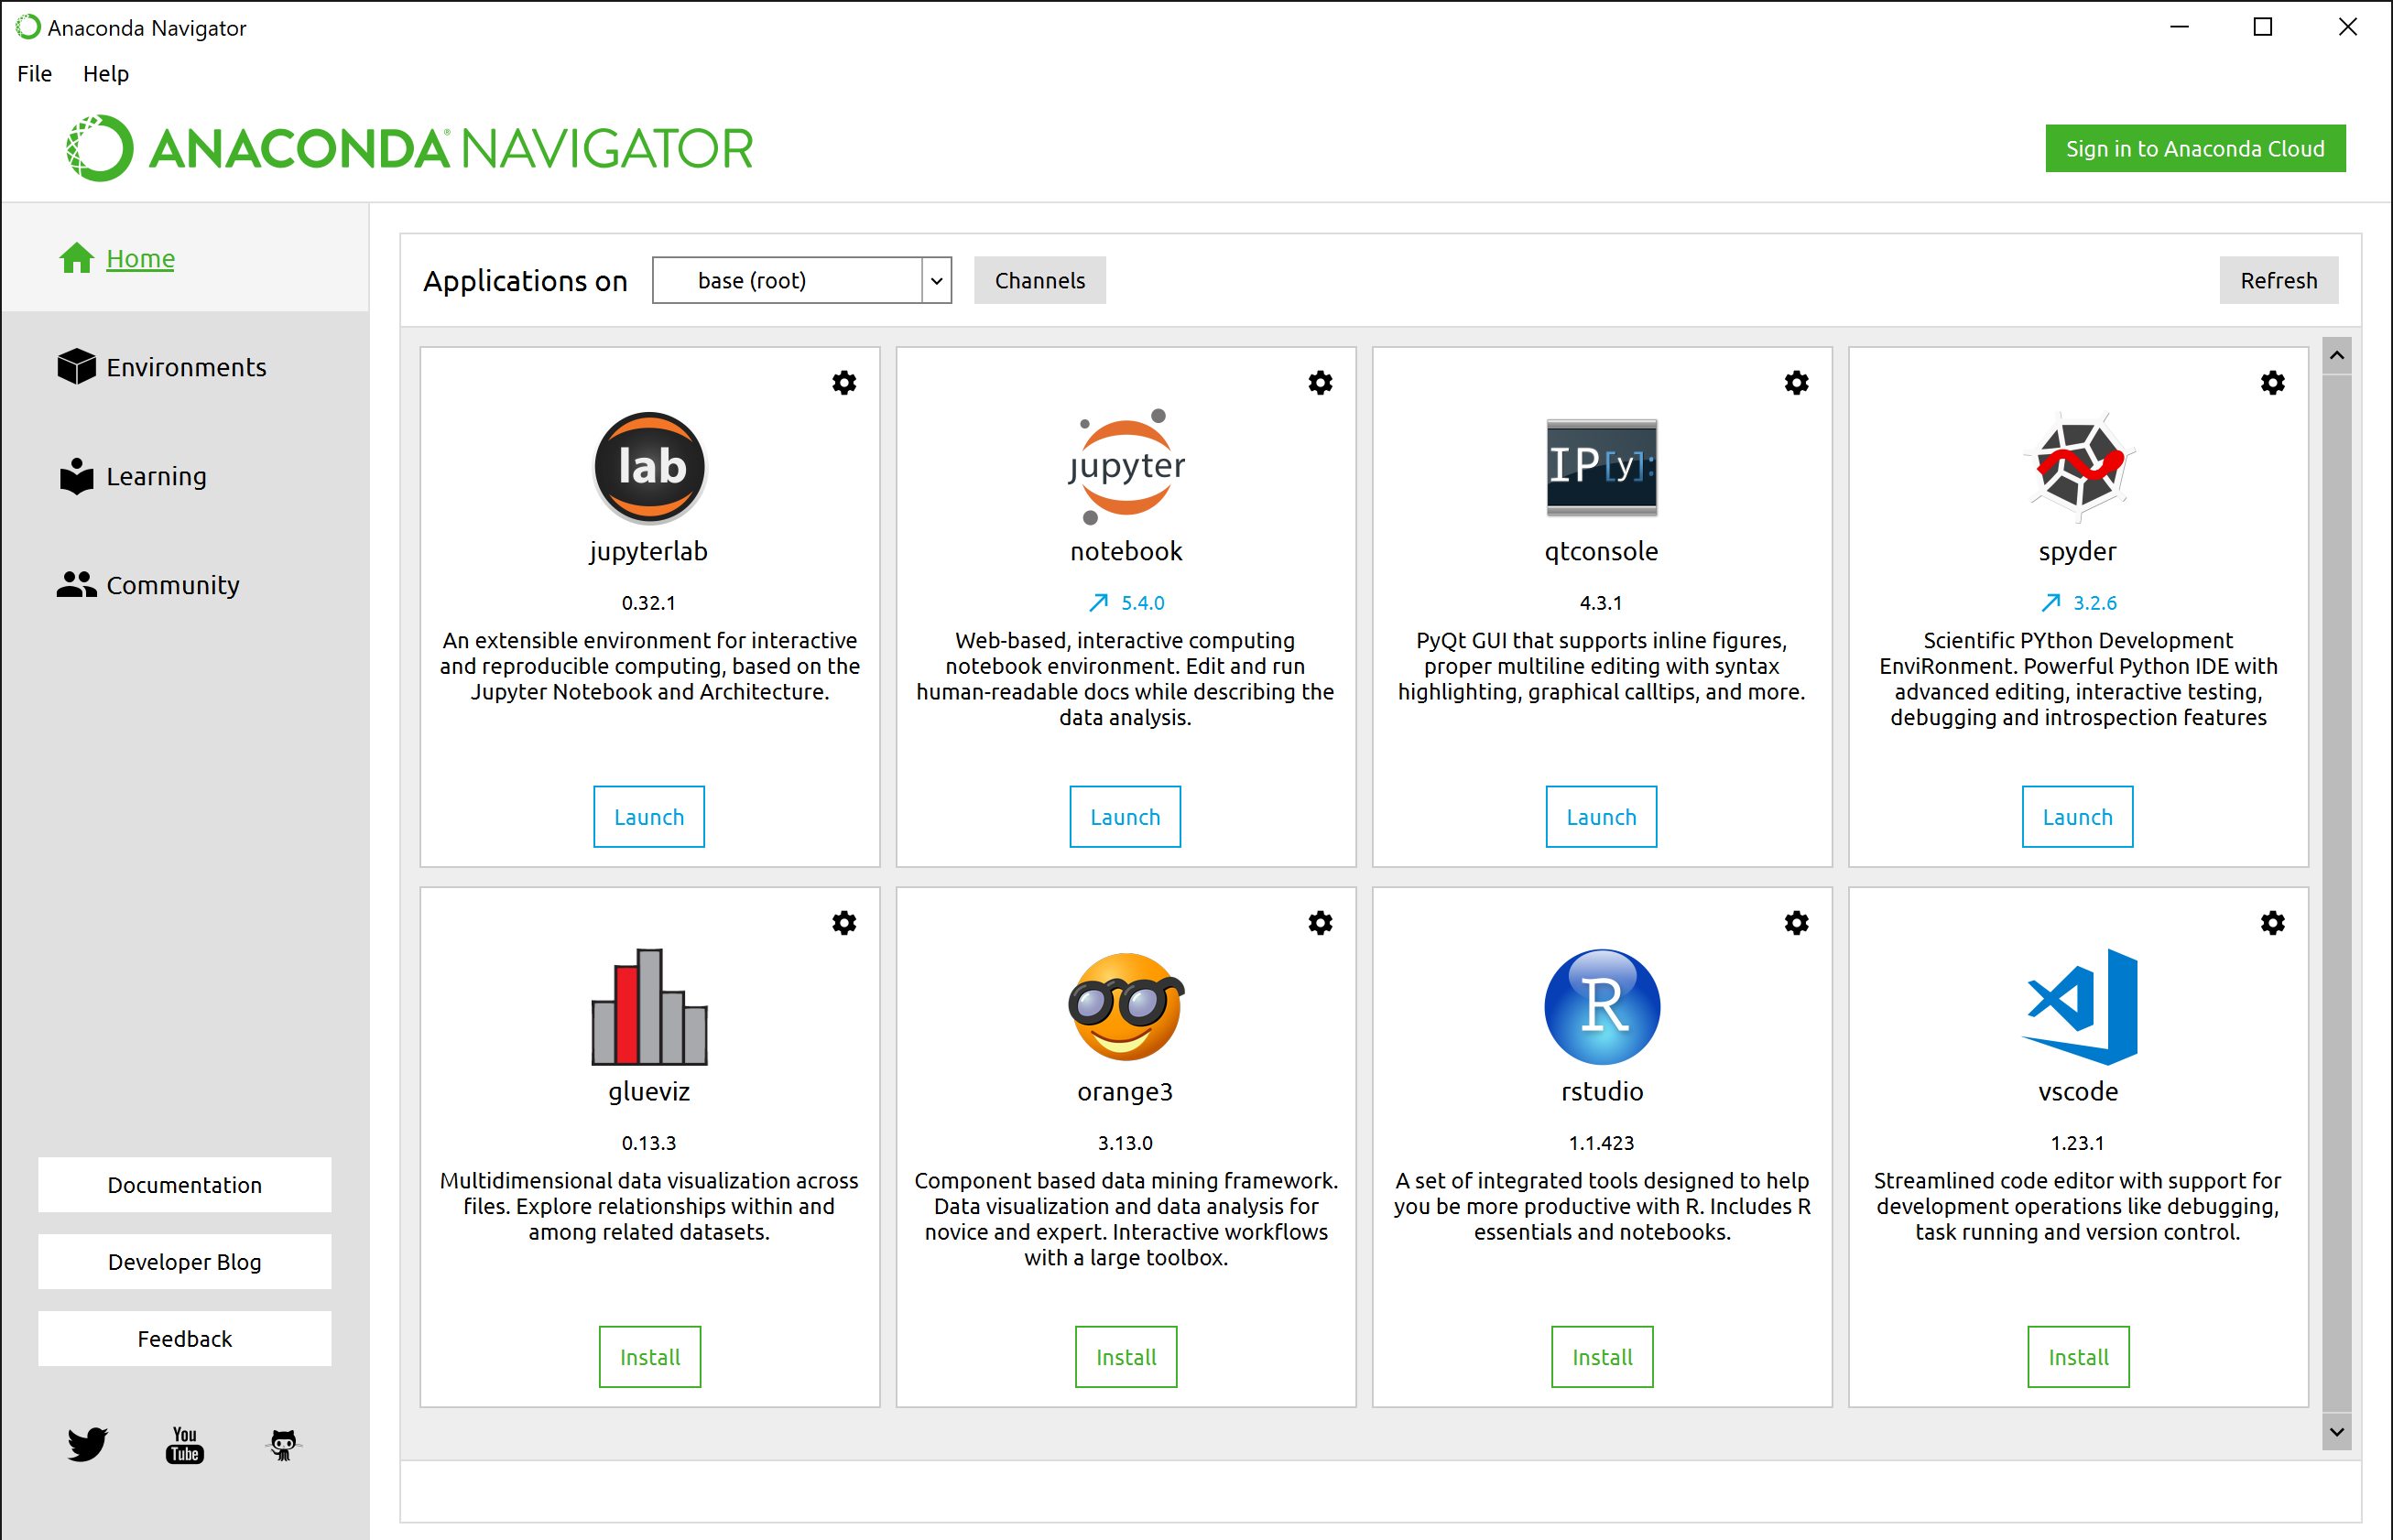
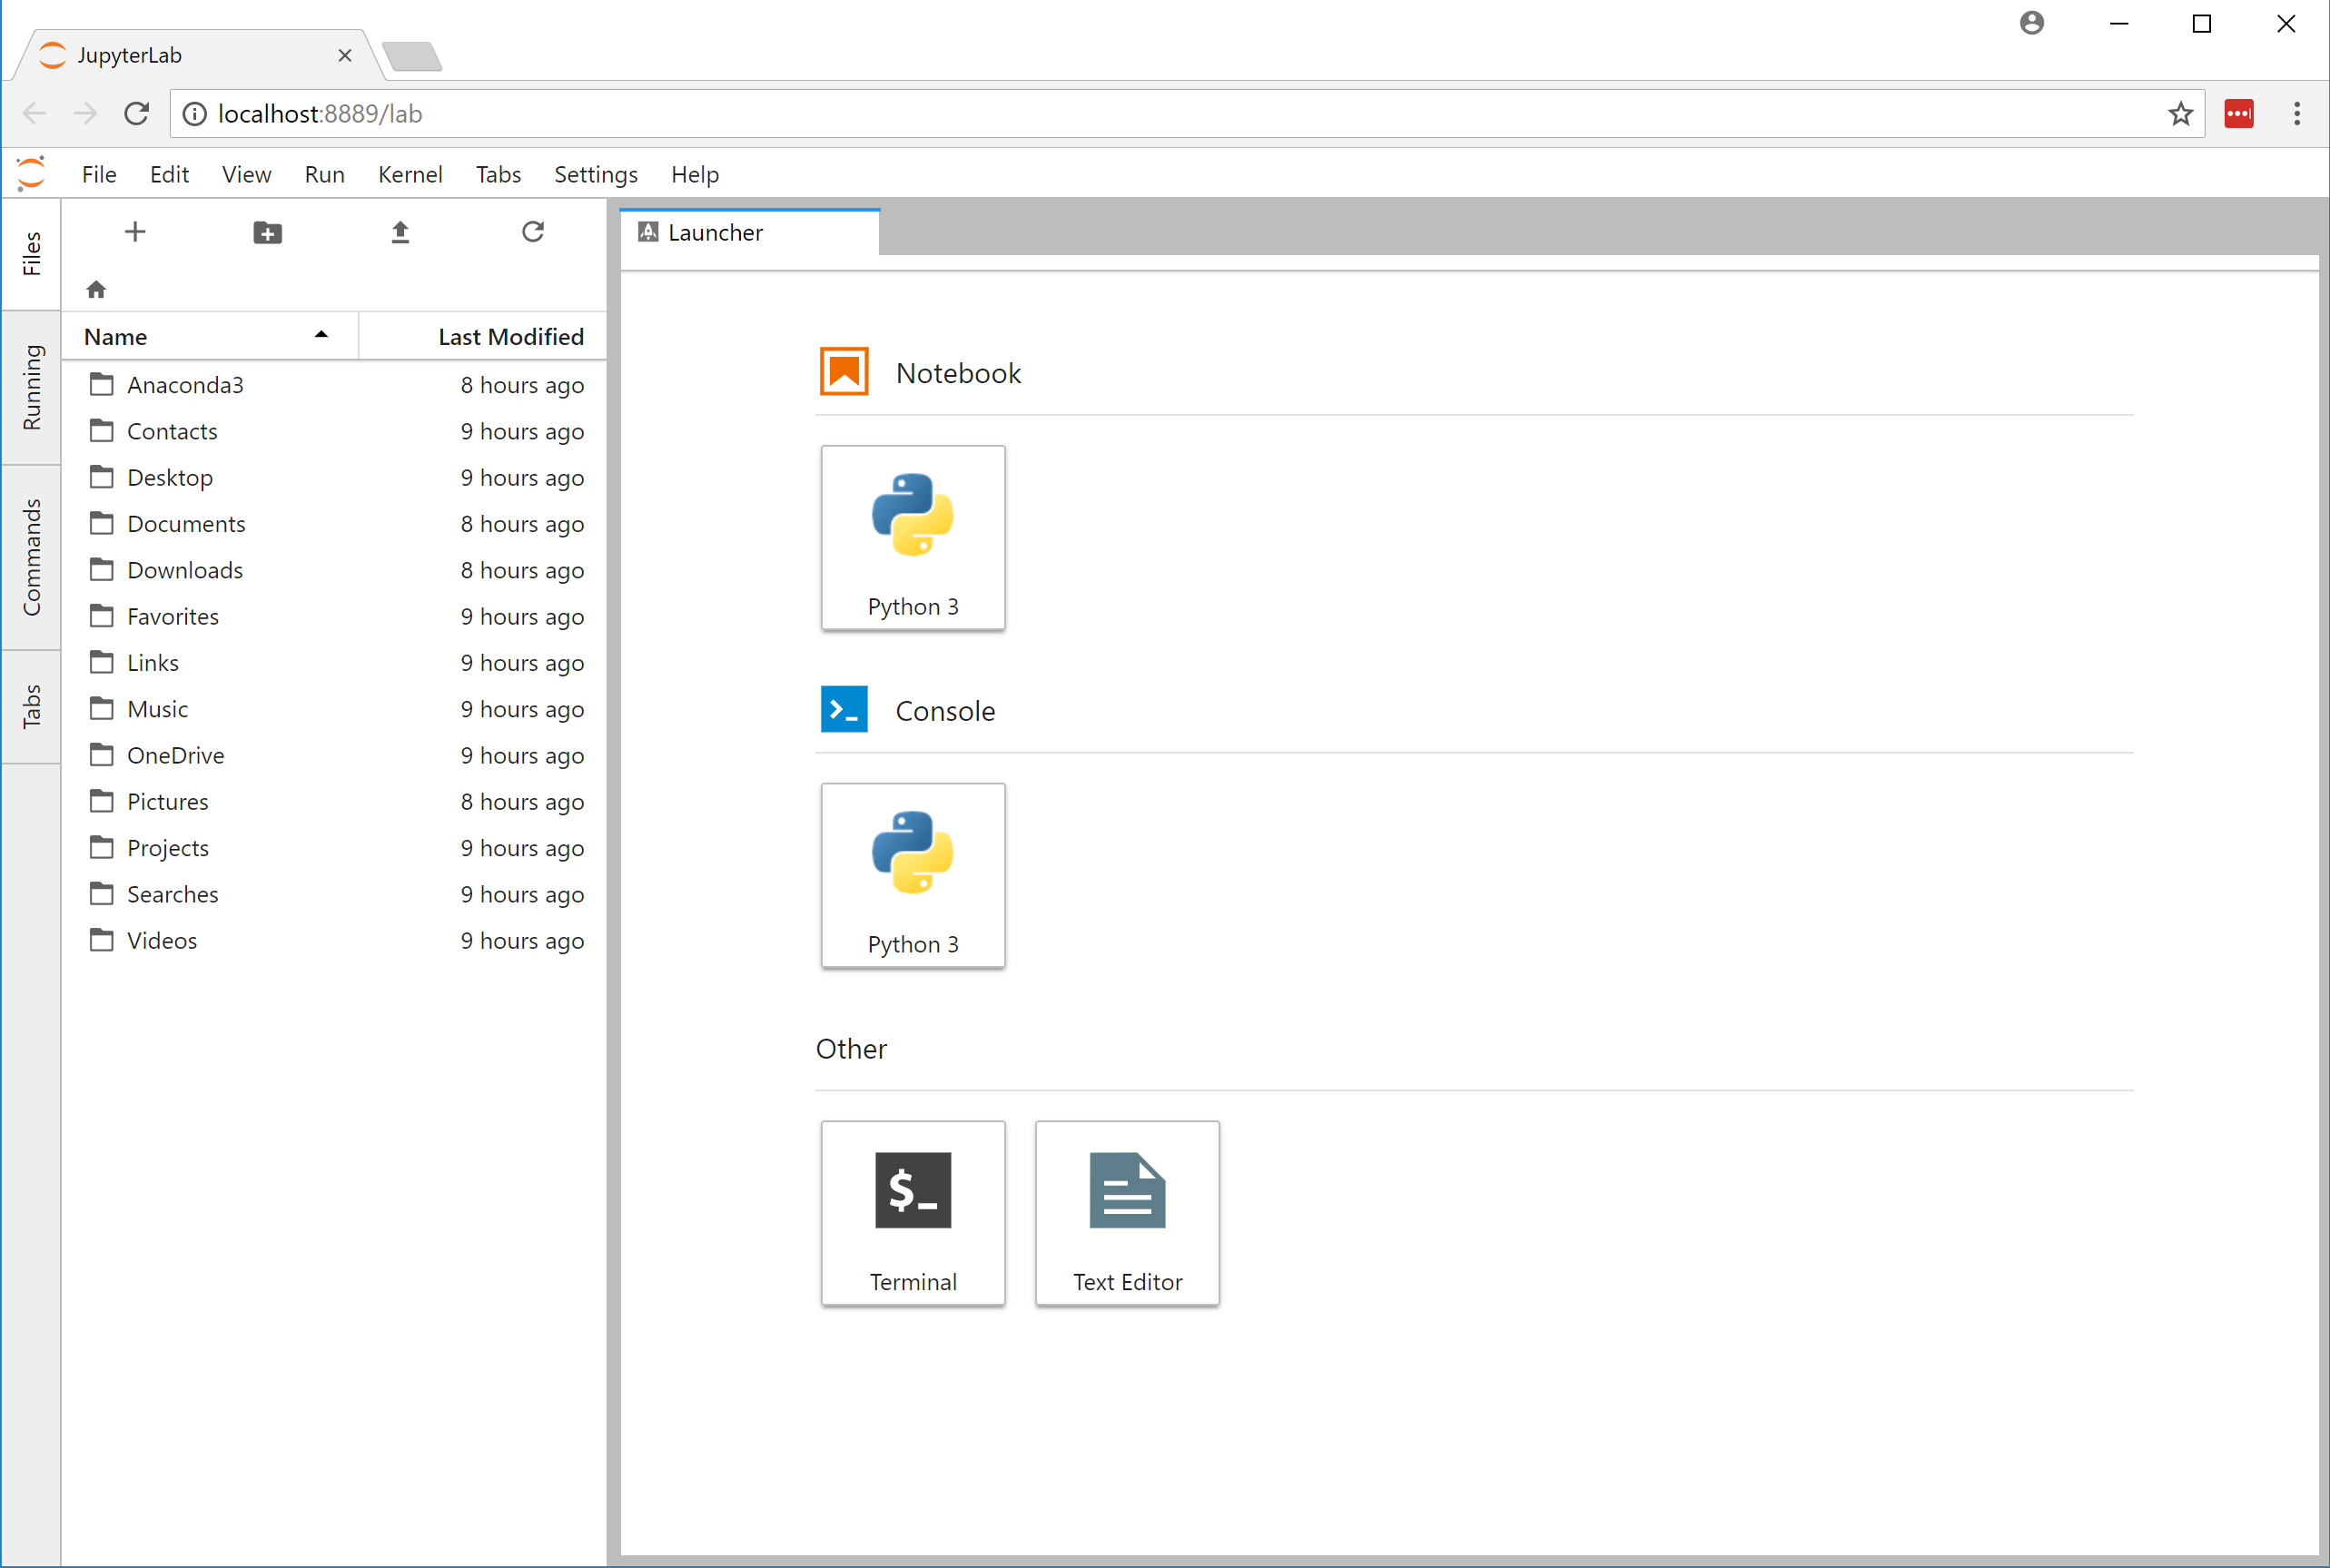
To make sure JupyterLab is working, look for the “lab” icon on the Anaconda Navigator dashboard, and click the “Launch” button. A new tab should open up in your default web browser, which will look similar to the screenshot below. If so, success! You’re all set! You can start exploring JupyterLab, or just close the browser tab and close the Anaconda Navigator window to exit the program.
If you prefer working from the command line, you can instead follow the instructions in Step 2 and Step 4 of the Option B section below.
Installation Option B: Miniconda
If you want a more minimal installation and are comfortable working from the command line, you can instead install Miniconda, a bare bones version of Anaconda that includes just Python, the conda package manager, and a few libraries that conda needs. You’ll then need to use conda to install the other 3rd party libraries that we’ll be using in the workshop. For this option, you’ll need about 4 GB free disk space.
Step 1: Download and Install Miniconda
Download the latest Python 3 version for your operating system from the Miniconda download page and run the installer, making sure to use all the recommended default settings. This installation is much quicker than the full Anaconda distribution and will probably only take a few minutes.
Step 2: Test Miniconda Installation
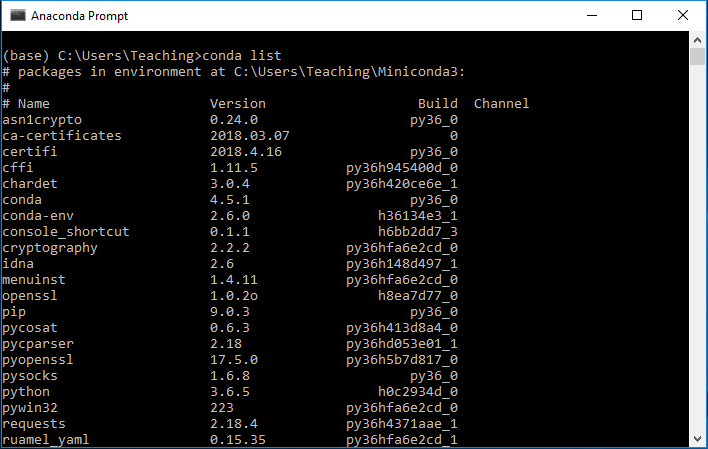
Next, you’ll need to check your Miniconda installation and then install several 3rd party libraries using conda. If you’re on Windows, look for a newly installed program called “Anaconda Prompt” and run it to open up a console similar to the screenshot below. If you’re on a Mac, look for a program called “Terminal” in the Launchpad, and run it to open a console window.
In either the Windows or the Mac version of the console, type conda list and then hit Enter to display a list of the currently installed libraries, as in the screenshot.
Step 3: Install 3rd Party Libraries
To install the libraries you’ll need for the workshop and example notebooks, enter the following command in your console window:
conda install jupyterlab pandas requests matplotlib seaborn cartopy scipy sympy
Follow the prompts to complete the installation. Then you can run the command conda list again in the console, and scroll through the (now much longer) list to confirm that the new libraries have been installed. As you continue to explore Python and want to try out more libraries, you can install them using the conda install command in the console.
Step 4: Test JupyterLab
To make sure JupyterLab is working, run the following command in the console window:
jupyter lab
A new tab should open up in your default web browser, which will look similar to the screenshot shown above in Option A. If so, success! You’re all set! You can start exploring JupyterLab, or just close the browser tab and close the console window to exit the program.