PyCharm + Anaconda
Jennifer Walker | jenfly (at) gmail (dot) com
This guide is a companion to https://jenfly.github.io/llc-python-resources/next-steps.html. Jupyter notebook source code and data are available in the Github repo.
Please email me with any questions, comments, or suggestions. I'd love to hear from you!
Now that you've installed Anaconda, let's see how to configure PyCharm to use Python from Anaconda, instead of the default Python that it was using before. To do this, you need to change the project interpreter. The project interpreter is the Python program that PyCharm uses when you execute commands in the console and run scripts. You can set up PyCharm to choose from multiple different interpreters, corresponding to different versions of Python installed on your computer.
Here are the steps to follow to switch to Anaconda Python as the interpreter for our llc-intro-to-python-master project.
1. Open Pycharm
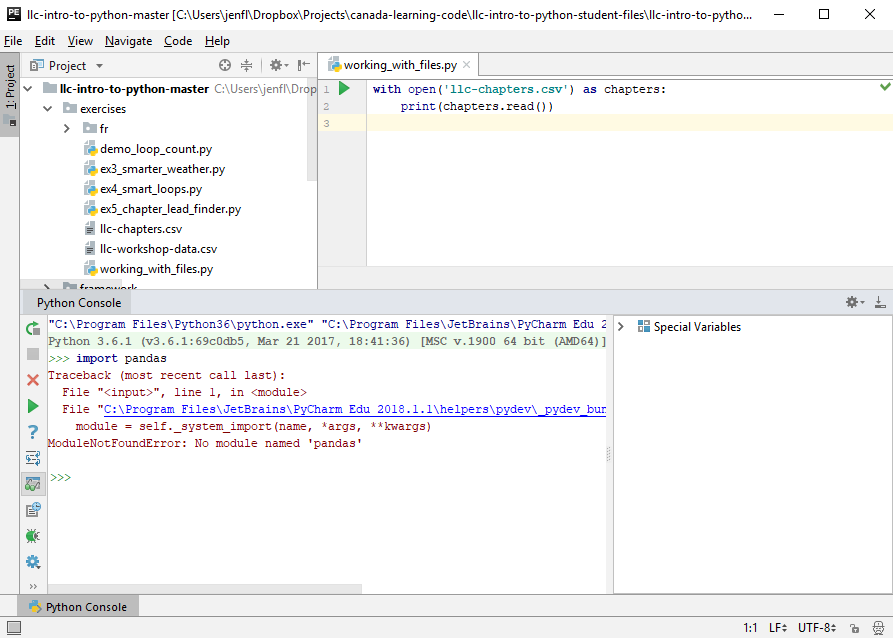
Try typing import pandas in the console. You'll probably get an error like the one shown below. Notice also the line that starts with Python 3.6.1 ... displayed near the top of the console. This is the project interpreter and it's what we need to change. Your console will display a slightly different variation, depending on what version of Python is currently installed on your computer.
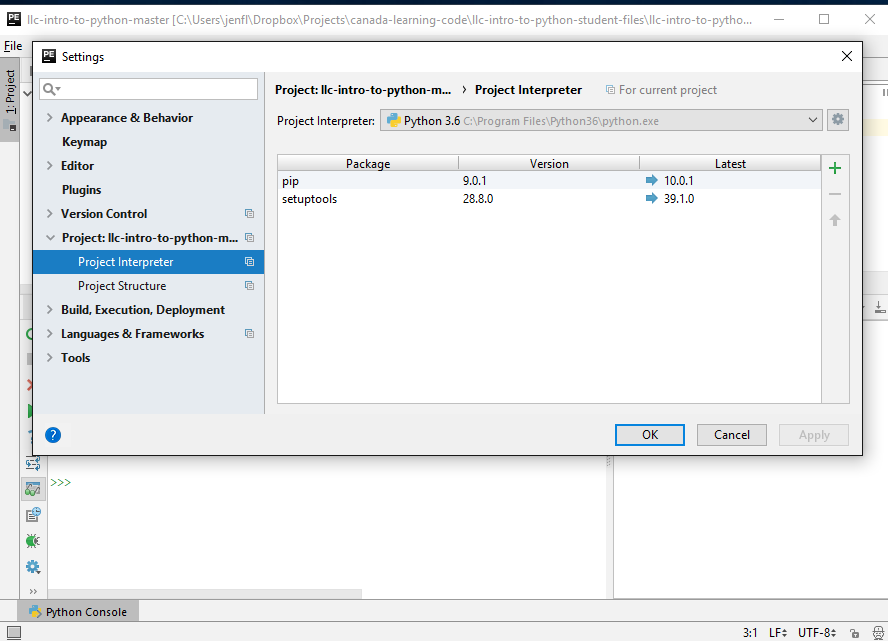
2. In the top menu, select File -> Settings, and in the window that pops up, select "Project Interpreter"
Or if you're on a Mac, select PyCharm -> Preferences from the top menu, then select "Project Interpreter"
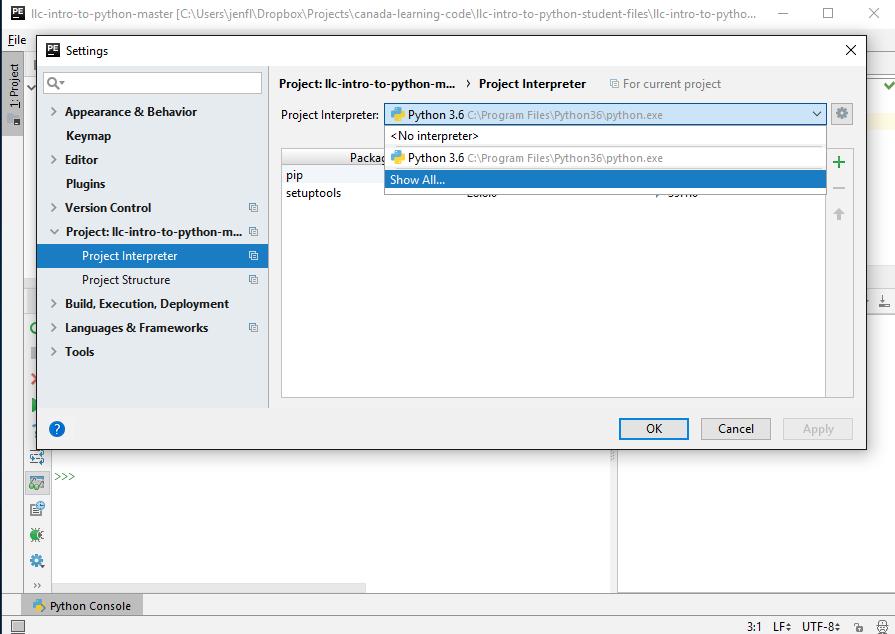
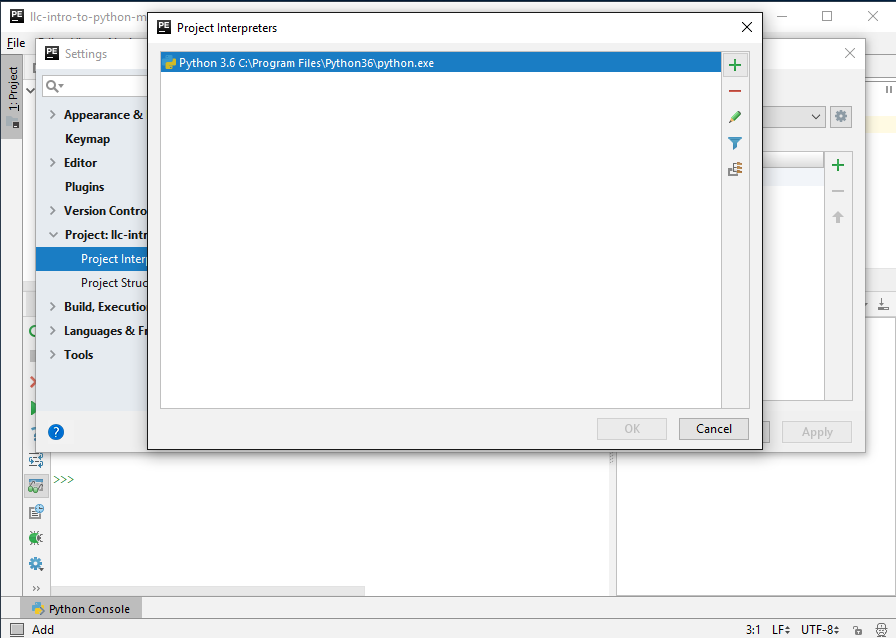
3. From the dropdown menu on the top right, select "Show All"
4. In the new window that pops up, select the "+" button on the top right to add a new interpreter
5. In the new window that pops up, select the "System Interpreter" from the side menu on the left
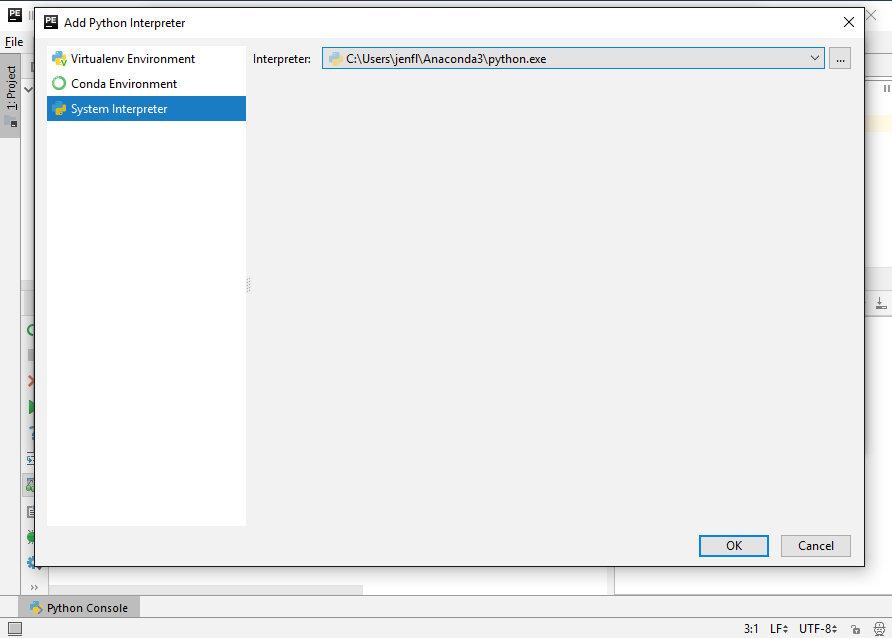
6. Click the "..." button on the top right.
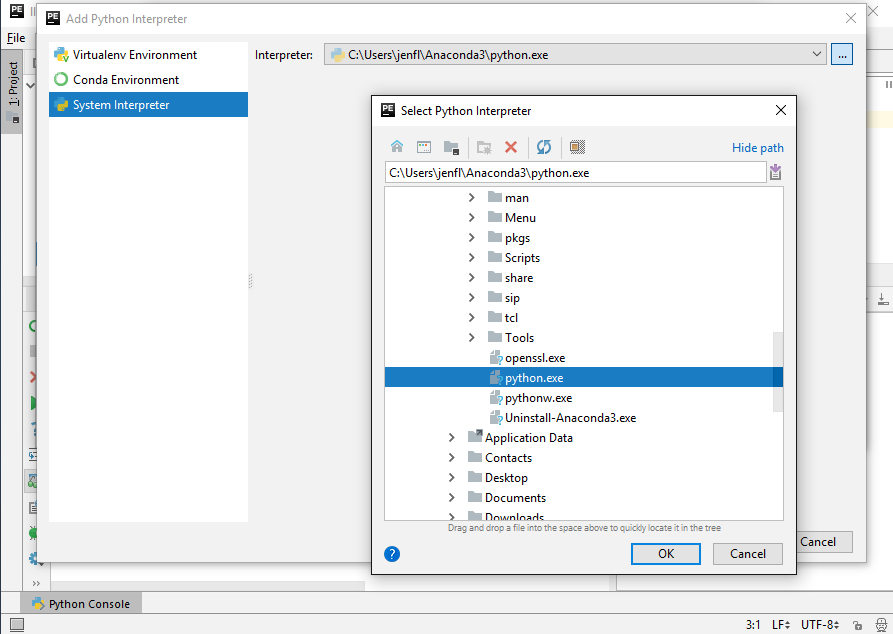
In the new window that pops up, navigate through the file system to select the folder where Anaconda is installed. This will likely be a folder called Anaconda3 that is contained in your main user folder (for me the folder is C:\Users\jenfl\Anaconda3). Select the file called python.exe within this folder, and click "OK".
Note: These instructions are for Windows. If you're on a Mac, you'll follow the same steps, but the folder and file names might be a bit different.
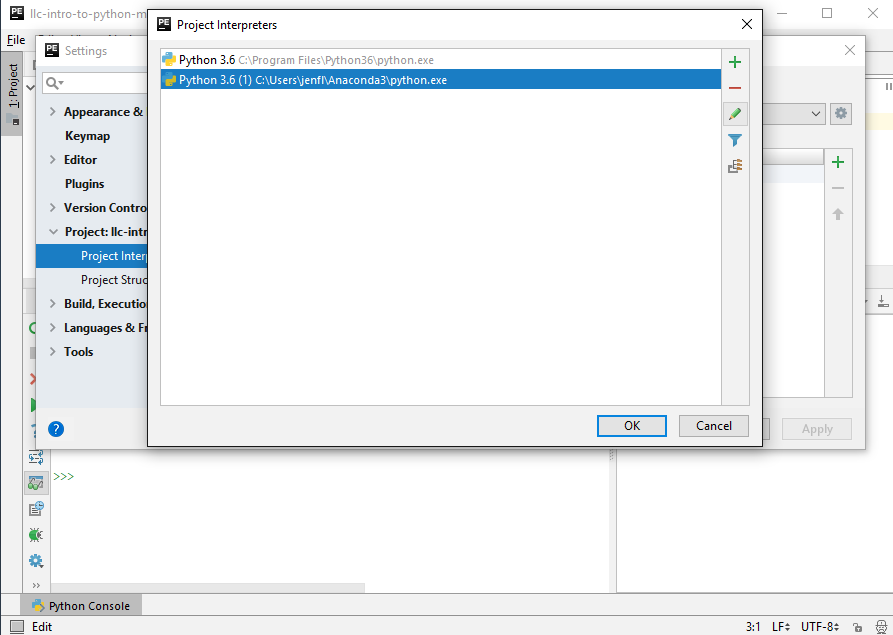
7. Now you're back to the previous window, which listed the available interpreters.
The new interpreter that you've just added should show up in the list --- you can find it by looking at the description and seeing that the file path contains Anaconda. Let's give this interpreter a new name to help you find it easily.
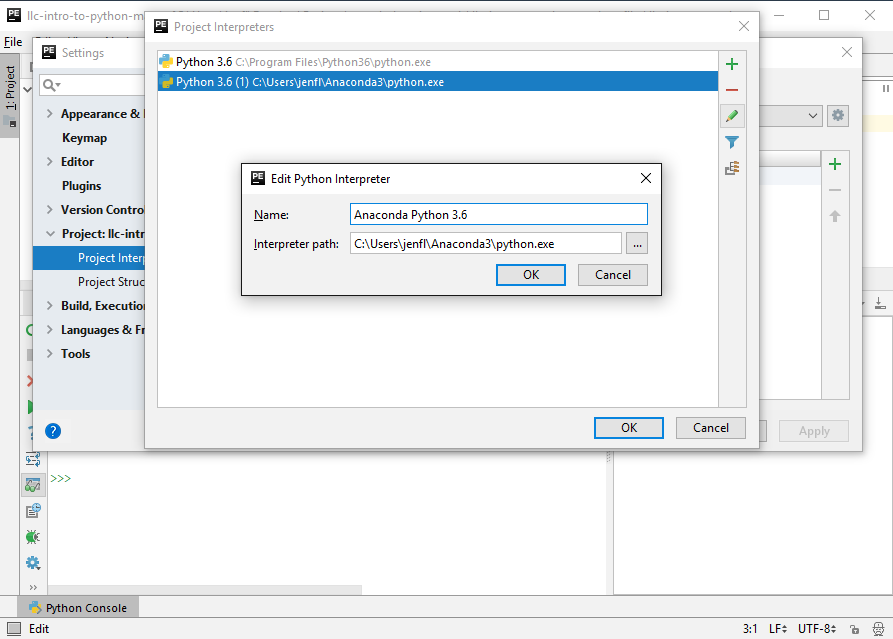
Make sure your new Anaconda interpreter is selected, and then click on the pencil icon from the side menu to edit it.
8. In the window that pops up, edit the "Name" field to rename the interpreter (e.g. "Anaconda Python 3.6") and click "OK"
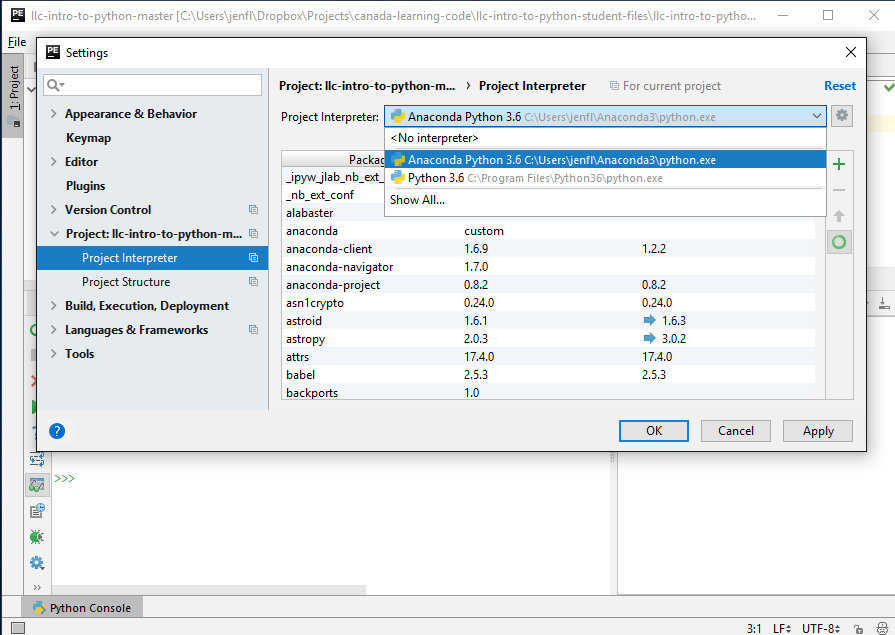
9. Now you're back to the Settings window
From the dropdown menu on the top right, make sure that your new Anaconda interpreter is selected, and then click "OK".
10. Close PyCharm and re-open it to implement the changes we made in the previous steps.
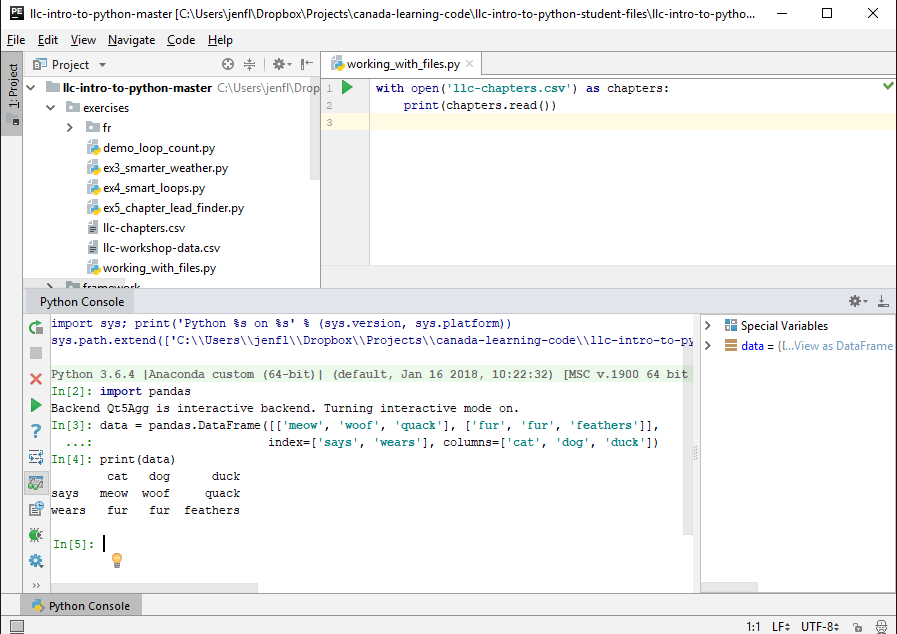
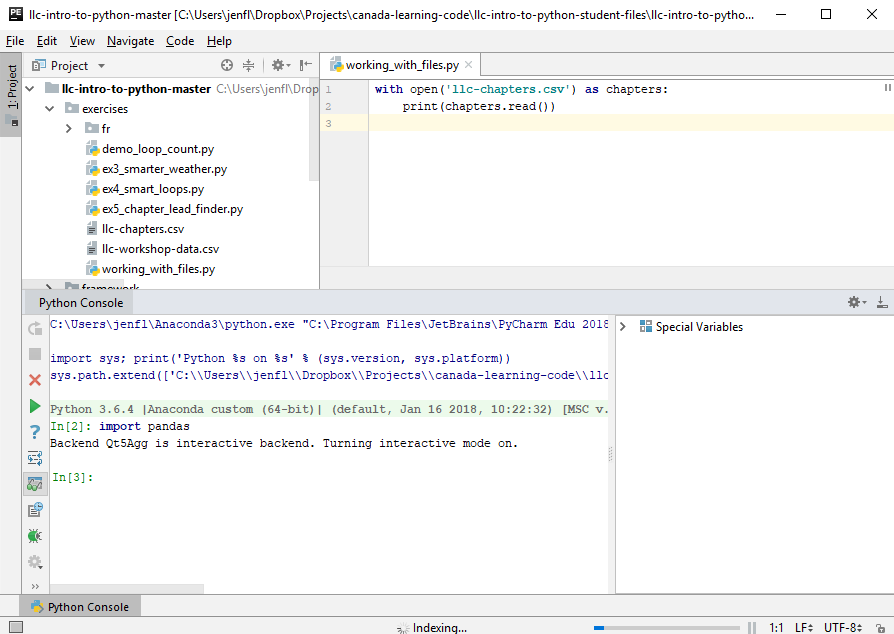
It may take a minute or two for the Python console to initialize with the new interpreter, so it might look empty at first. Then, when the console has started up and is displaying some information at the top, check out the line which starts with Python 3.6.4 | Anaconda custom (64-bit) --- yours will display something similar. Notice how this line has changed from step 1? This shows that we've switched over to our Anaconda Python interpreter.
Now try typing import pandas in the console. If everything worked properly in the previous steps, this command should execute without any errors. You now have access to all the 3rd party libraries that come pre-installed with Anaconda!
11. An example to test your new interpreter
Try copying and pasting the following code into your console:
data = pandas.DataFrame([['meow', 'woof', 'quack'], ['fur', 'fur', 'feathers']], index=['says', 'wears'], columns=['cat', 'dog', 'duck'])And then type print(data) in the console to see the new variable you just created. It should look like a little table... intriguing! This is a type of variable called a DataFrame, and it's like a table from a spreadsheet or a .csv file. With pandas you can do all the things you would do with your data in Excel or Google Sheets, plus so much more!
For now, don't worry about the details of how the above code works --- you'll get to that in due time as you keep working through the basics and starting learning about the various libraries. Now that you've gone through this process to set up your computer with Anaconda and PyCharm, the great thing is that you have all these libraries immediately available whenever you're ready to dive into them. You won't need to go searching around for the libraries you need and installing them yourself --- they're already installed and ready for you!